Steve Jackson, KZ1X
revised December 29 2019 ….
The way that most people learn Morse Code best is in a classroom style setting. From roughly 1840 through about 1970, this was the manner in which most people learned Morse Code.
For a variety of reasons, beginning in the early 1980s, a trend began where people either did not have the opportunity to attend a classroom setting and / or took it upon themselves to try and self-teach the skill. The former is unfortunate; the latter, many times more challenging.
Well, amateur radio certainly has changed in the ensuing decades but what has not changed is the desire among many hams to be able to use Morse Code on the air.
Due to practical limitations such as the lack of a suitable classroom venue, the geographically diverse nature of potential students, busy lifestyles, and availability of instructors, it is not likely we will see a return to regularly scheduled, local, sit-down type Morse Code classes.
However, for those who do wish to learn in a class-styled environment, and who already hold a Technician or higher grade of amateur license, there may still be an alternative for a group-oriented Morse Code learning environment.
A Proposal
OCRA maintains a wide coverage UHF repeater. Like the majority of repeaters over the past 15 years or so, it is inactive most of the time.
This terrific and underutilized resource could easily host a scheduled on-the-air Morse Code class for students already holding amateur licenses. This document describes such a class.
Conceptually, the idea is simply to move a traditional sit-down classroom experience to one conducted in real time via a repeater. By making it interactive, on the repeater, the class will train participants to communicate over-the-air in Morse Code.
Yes, that’s it. The sole goal of the class is conferring the demonstrable ability to send and receive Morse Code on the air.
Before you ask:
There is no sending or receiving speed goal for this class.
Setting such a goal was important in an era when there was a standardized FCC test to pass. Teaching to receive at a given speed did not serve students well; it only helped the test proctors. Moreover, without a sending test, the underlying Morse communications skill of the student is not certain.
Therefore, a fixed-speed goal is not appropriate for a Morse Code class taught in 2020. Think of this class instead like “Marconi meets Montessori.”
Anticipating your next question:
What speed are the lessons sent at?
The answer is:
Since the class goal is to be able to make practical use of Morse Code on the air, the so-called speed for lessons is actually a more complicated issue than a simple number.
The speed of the dots and dashes for lessons is set at the natural rhythm rate, such the listening part of the brain will not try to ‘count’ these symbols. Instead, each letter’s acoustic pattern gets interpreted by the brain as a unique musical sound. Thus, the same part of the brain used to remember the first notes of a favorite song is activated to memorize the letters.
This is also why significant effort has been put into making the tones used in the class have musical integrity (pitch, tonality, and harmonic content are controlled).
In turn, the space between the letters is artificially lengthened from the expected spacing, so that the student will have time to write down each letter sent.
Focusing on “how fast?” as the sole metric for success is great for horses, not for people. This is about recognition, not rate. Once one knows all the letters and digits, increased speed is then only a function of experience and desire.
How Will The Class Work?
A class participant will learn Morse code over a period of approximately two months. The letters of the alphabet, the ten digits, and certain punctuation and procedural signals are introduced to students each week, in a graduated process.
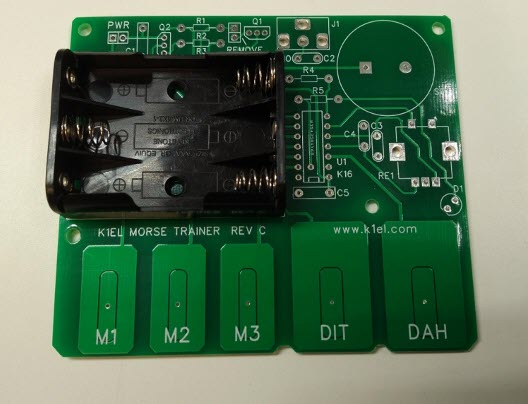
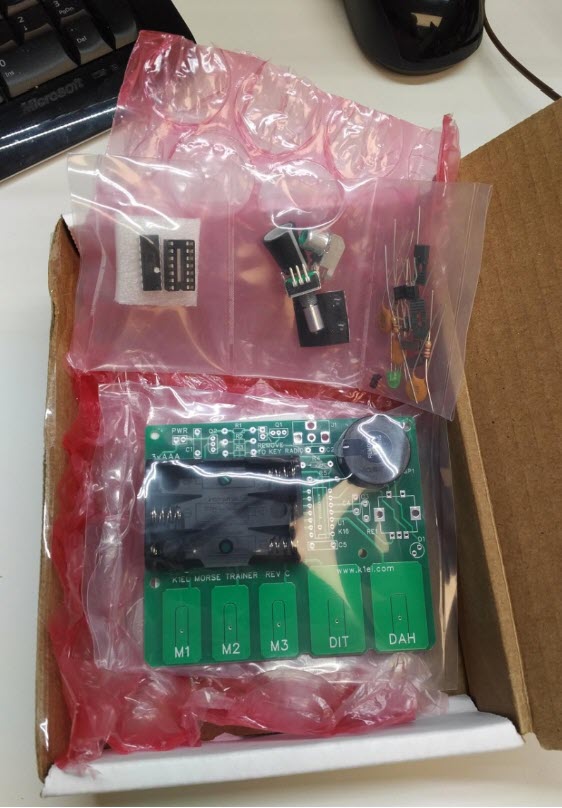
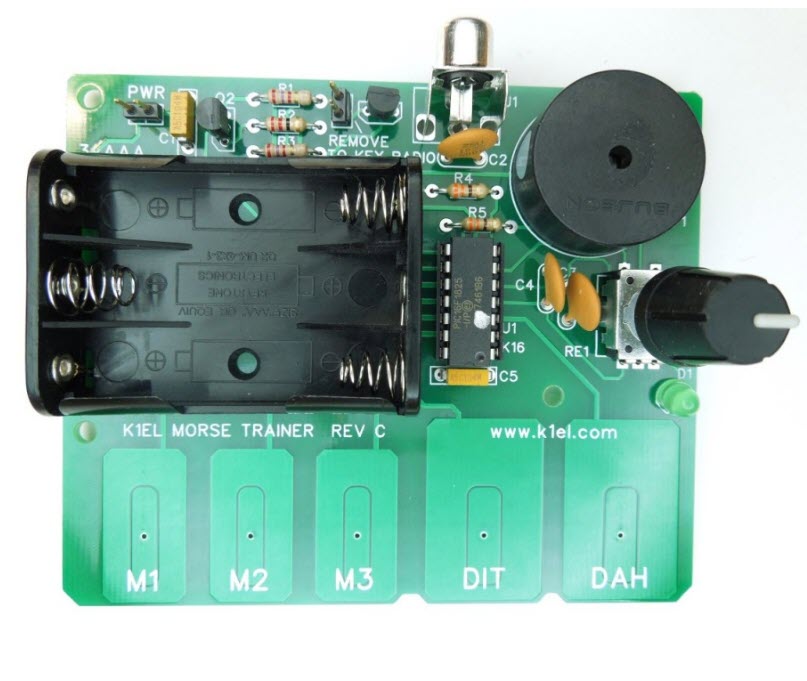
Materials used are a combination of a Windows software application by G4FON, the K1EL Morse Tutor keyer kits, and a weekly over-the-air interactive instructor-led lesson. The software is used to make the letter introductions, and to help weekly home practice.
Dividing the 26 letters into four groups allows one to learn the more frequently used letters first. In turn, this allows the most rapid progress towards forming words. Quickly thereafter, students can create simple sentences.
The class design is interactive because student participants both receive and send in each class, and draw upon each other’s success. All of this occurs exactly as it would in a ‘live’ in-person setting. It is therefore vitally important that the students faithfully complete each week’s homework and come prepared for the next class.
Classes, Equipment, and Software
Classes
The class itself consists of eight on-the-air lessons, plus preparatory work.
Preparatory work consists of using the software to practice and learn the assigned new letters each week. Most people find that this will take from 1 to 3 hours per week. (Weeks 2 and 4 are hardest.)
Each on-the-air lesson will be roughly 30-45 minutes in length.
There is a fixed curriculum. One cannot ‘skip’ any lesson, nor are there any make-up lessons possible.
This is in part because the lessons are not simply recordings. They are interactive, and, each lesson builds upon the previous one. In addition, students are active participants in the learning process for and with other members of their cohort.
Each over-the-air lesson consists of a student-listening portion, and a student-sending portion.
- In the student-listening portion of each class, the instructor reviews the new letters introduced the previous week, by sending the letters over the air to the students.
This listening portion consists of these most recent letters, sent in three sequences of ten random groups of four letters each. The instructor, using an automated tool, transmits these.
After the lesson, the actual letter groups sent will be posted on line, so students can check their copy.
- In the student-sending portion, the student will formulate words from all the letters learned so far in the class, and then send those words over the air so other class participants can copy them. Each student will send at least two words (generally 4 or 5 letters each).
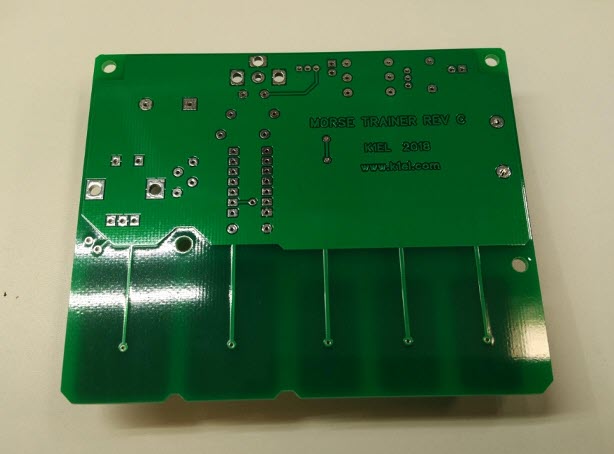
The student-sending portion of the class is one reason for the K1EL Morse Code tutor kits. These kits allow a low-cost way of sending good quality modulated-CW signals over the repeater.
If a student wishes to use some other Morse tone generation gear, that is their option. However, it will still be necessary to use the same settings as shown below (in the software topic), so that all class participants’ signals sound similar (pitch, speed, spacing).
The student will need to be able to hold their microphone close enough to their kit’s speaker so they can send their words over the air. Of course – they must ALSO access the repeater well while doing so.
Equipment
The intention is for the typical local, licensed amateur to participate in the class easily, with minimal additional expense.
An assumption is that all students will already have the means to access the repeater, often via a handheld radio. It is prudent to check one’s signal into the repeater from the location where one will participate in each week’s lesson, prior to starting the course. Adding an external gain antenna and perhaps a corded microphone accessory could be very helpful.
An in-person set-up session prior to the first class will be available, so that students’ K1EL Morse Tutor kits can be programmed. The reason for this is because the Morse Tutor kits are programmed using Morse Code, and of course, the student using this Tutor does not yet know Morse Code.
The programming will be for rates, student callsign, audio pitch, and related settings.
Software
The software used for the class is by G4FON. It is a Windows program. (If you absolutely must use some other platform, please contact Steve, KZ1X, to discuss options.)
Several features of this software make it the ideal choice. The primary one is the feature where the user can select specific letters for the computer to send, repeatedly, allowing the student to learn new letters every week according to the class syllabus.
Other G4FON program options allow the computer-generated Morse Code to ‘sound’ like the class lessons do.
To set up the G4FON software for the class, choose the following settings on the main screen:
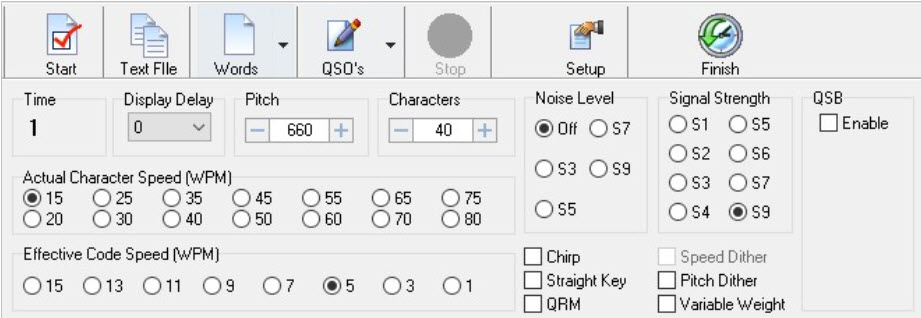
- Set the Pitch to 660
- Actual Character Speed to 15
- Effective Code Speed to 5
and make any needed changes to the ‘button’ type options, as shown above.
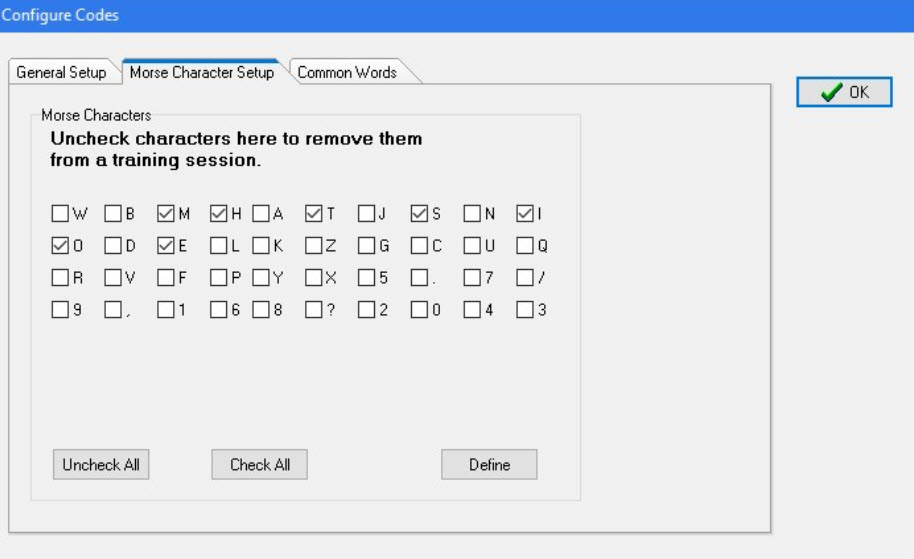
Afterwards, open the ‘Setup’ tool and choose the “Morse Character Setup” tab:
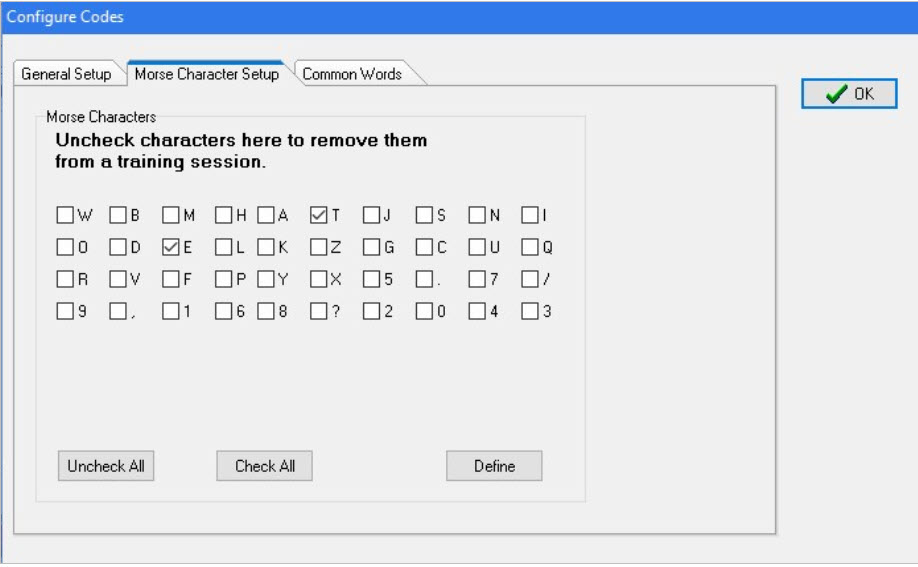
For the first lesson, choose only the letters ‘T’ and ‘E’ as shown above.
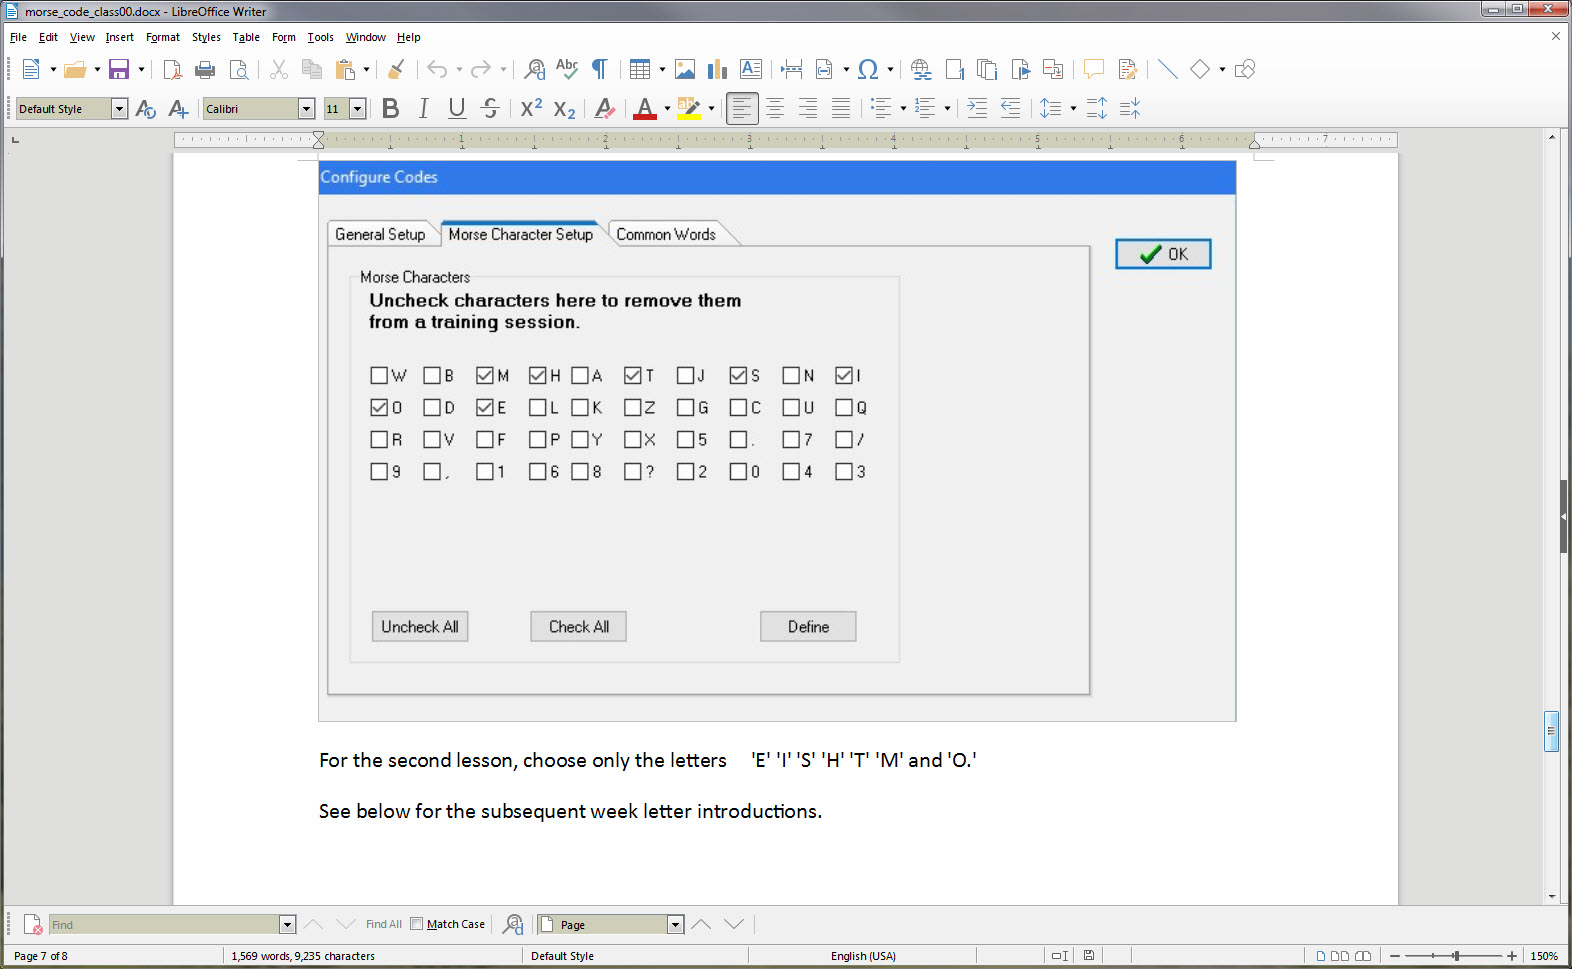
For the second lesson, choose only the letters ‘E’ ‘I’ ‘S’ ‘H’ ‘T’ ‘M’ and ‘O.’
See below for the subsequent week letter introductions.
Here is a link to access the software:
http://www.g4fon.net/CW%20Trainer.htm
Lessons
Lesson 1 E T
Lesson 2 E I S H T M O
Lesson 3 A W J N D B
Lesson 4 U V G Z K R P X
Lesson 5 F C L Q Y
Lesson 6 1 2 3 4 5
Lesson 7 6 7 8 9 0
Lesson 8 . , ? /

