
By Charles McComas KN4PTU
I like having a wired desk phone in my home office/radio shack for use during conference calls and long waits for tech support. The clarity and functionality of a landline desk phone is much better than the average cellular connection. Until the last few months this was handled quite well by a VPN connection to my employer’s Cisco VOIP system. After I retired, I started looking for a new solution. In a perfect world, I would have gotten a POTS (Plain Old Telephone Service) line, as the reliability of the old analog copper wire system is unmatched by the newer VOIP (Voice over Internet Protocol) telephone services. Unfortunately new POTS lines are not available and all telephone service providers are rapidly changing existing lines to VOIP.
Checking with AT&T, my current ISP (Internet Service Provider), it would cost me a $100 setup fee and around twenty dollars a month for a phone line. I have had great experiences with the knowledgeable AT&T technicians in the past but a $100 service call to plug in a patch cable is a bit steep.
In my net surfing I came across Obi, who makes a range of ATA (Analog Telephone Adaptors) devices and phones. I ordered an Obi, now Polycom Obi202 ATA (Photo 1) as it has a second phone line port that I plan to use for the fax function on my multi-function printer.
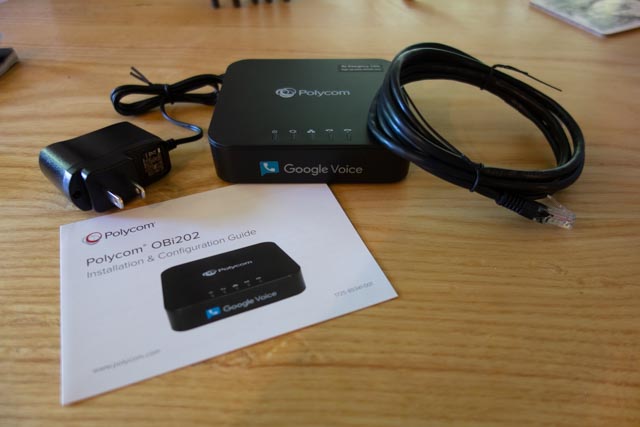
(Photo 1) Polycom Obi202
The back of the unit (Photo 2) has the two phone line (RJ11) connectors, a USB port for future functionality and two RJ45 connectors, one for Internet in and one for Internet out.
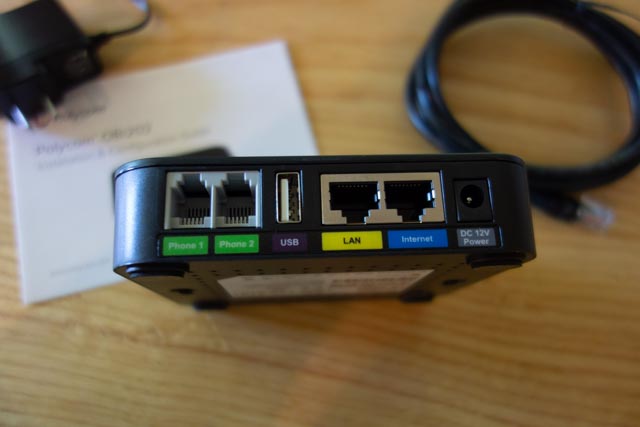
(Photo 2) Back of the unit.
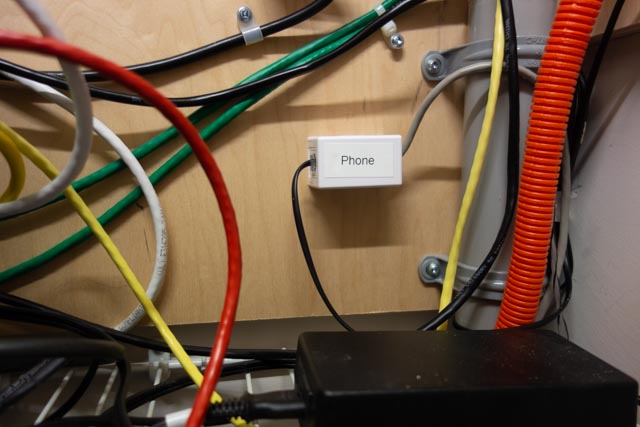
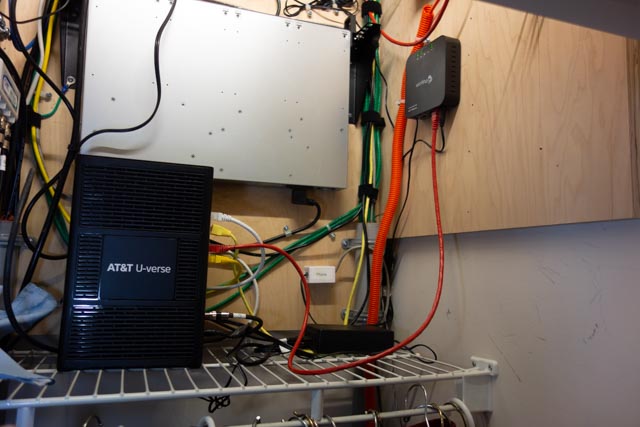
I will be installing the device in my hallway coat/telecom closet (Photo 3).
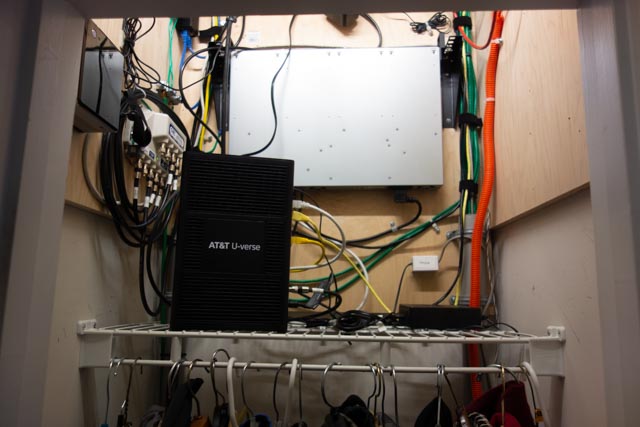
(Photo 3) Telecom closet.
I used a piece of masking tape to make a template for the mounting slots (Photo 4).
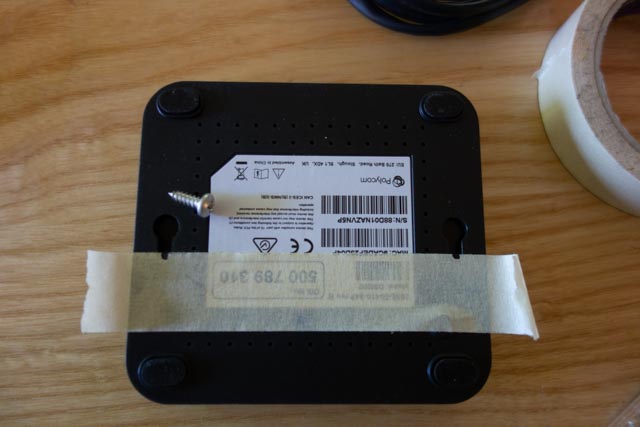
(Photo 4) Marking the mounting slots
I drew a level line with a torpedo level and stuck the tape to the line (Photo 5).
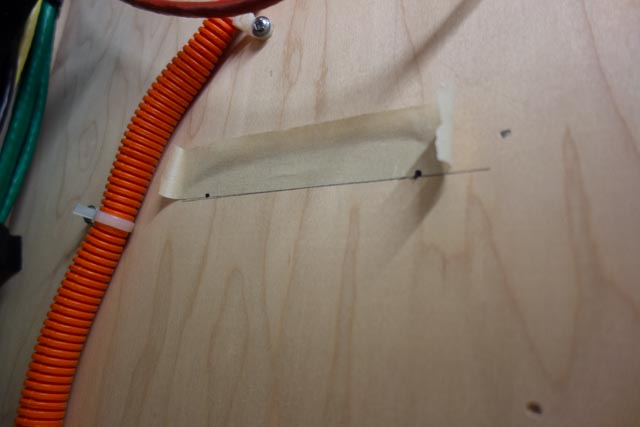
(Photo 5) Tape template and level line
Drilled the holes for the mounting screws (Provide your own) and screwed them in (Photo 6).
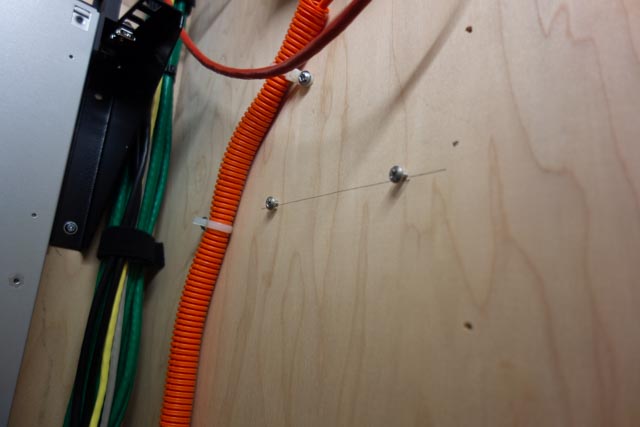
(Photo 6) Installed mounting screws
I connected the provided patch cable to an open Ethernet port on the AT&T modem (Photo 7).
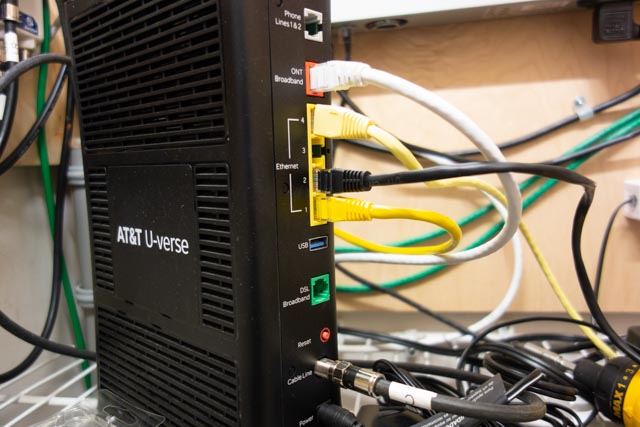
(Photo 7) Modem Ethernet ports.
and to the Internet in port on the device (Photo 8).
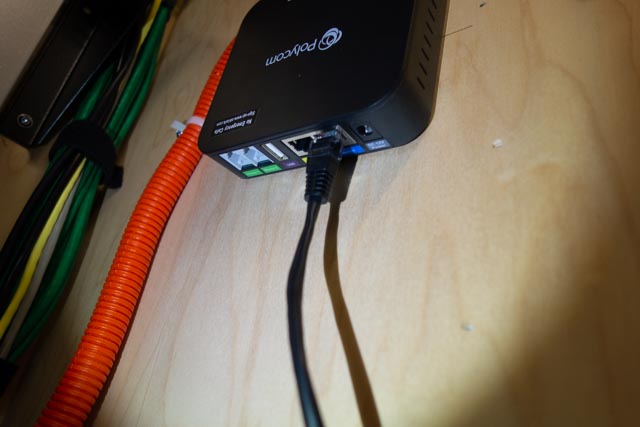
(Photo 8) Patch cable attached to the Obi 202
A four-wire phone cable with RJ11 connectors goes from the Phone 1 port on the unit to a surface mount block in the closet (Photo 9).
(Photo 9) Telephone line cable connected to the surface mount block.
. The cable from the block is spliced into the house’s original telephone service cabling and provides a dial tone to every telephone outlet in the house.
Before installing the power supply, I mark it with a paint marker to identify what equipment it is used for and the output voltage (Photo 10).
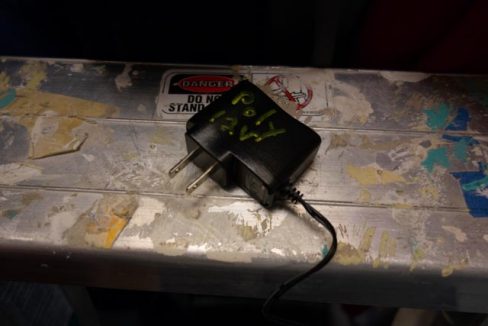
(Photo 10) Power supply
This comes in handy later to match up equipment with a power supply or to clean out a drawer that is overflowing with old power supplies.
The power supply is connected to an open outlet on the server rack PDU (Power Distribution Unit) and to the device. We have power and blinking lights (Photo 11).
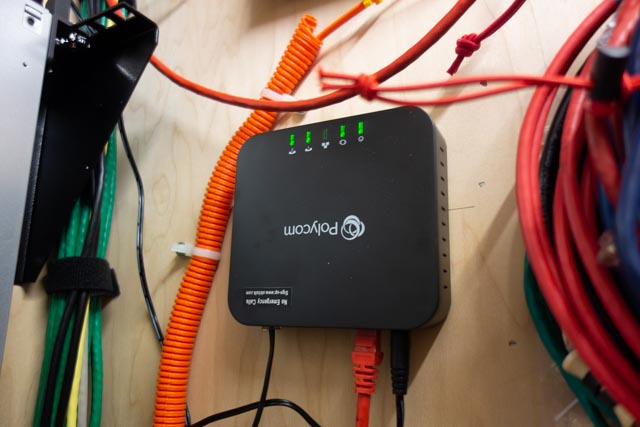
(Photo 10) Connected and powered up.
An Aastra 480e, analog desk phone, is connected to the phone jack in my office. I have a dial tone and I dial the special number provided in the instruction and do a echo test (Photo 11).
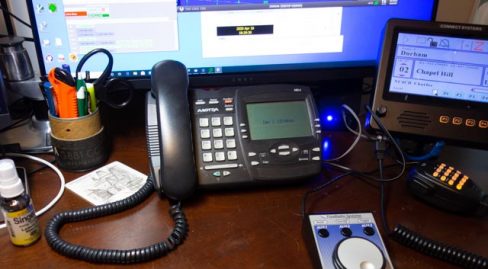
(Photo 11) Desk phone in place.
The next step is to set up a account on Obitalk.com. Once you have done that, you start the setup for a new device. On the phone connected to the ATA, you dial the number provided on the setup page and the Obitalk back end server identifies the device and you will see the device listed on your account web page
With a Obitalk account you can call and talk to other Obitalk accounts for free, but to call outside of the Obitalk network you need to have a account with a VOIP service provider. Obitalk supports most of the major home and small office VOIP providers as well as Google Voice. I have used Google Voice since before the technology was bought by Google and have been satisfied with the service. Best of all it is free for calls in the U.S. and Canada. But if you think that Google already knows too much about your life, you can go with one of the other VOIP providers. Also a big Warning, 9-1-1 service does not work with Google Voice. However you can add 9-1-1 service from another provider to your setup in Obitalk and still use Google Voice. Another concern is what Google gives for free, can be taken away in an instant, so I would not use a free Google Voice account for a phone number that is tightly tied to your business or where you can’t take an outage for a day or two. If you pay for G suite, those worries are about nil as Voice is part of G suite
Since I used my Google account to set up my Obitalk account, it had already configuring the Polycom Obi 202 to work with Google Voice. I made a few selections on what phone line to use for inbound and outbound calls and that was it. Configuration took less than 10 minutes and the total time I spent on the installation was about a hour. Most of that time was bringing in and then putting up the tools I used to install the device in my closet. Voice quality is very good. Reliability is too soon to tell.
(Photo 12) The finished installation